Home > Data Backup and Recovery > How to Configure a Network Switch
How to Configure a Network Switch from Cisco
Understanding how to configure a network switch is a complicated process if the technology is new to you. In fact, it is recommended that you hire experts who can do configuration and network management. In this article, we will discuss briefly what a network switch is before we discuss the steps on how to configure a network switch from Cisco.
What is a Network Switch?
A network switch is also referred to as switching hub, bridging hub or officially MAC bridge. To know how to configure a network switch is to know its basic definition first.
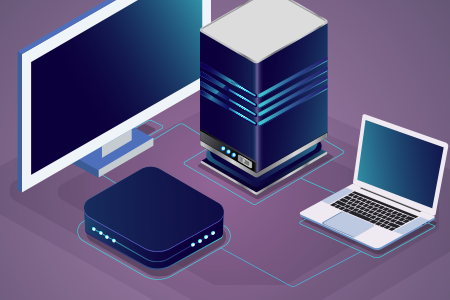
Take note that this device is used for connecting all the components of a computer network with the use of packet switching. It allows data to to be received, processed, or forwarded to its intended destination. It is a multiport network bridge that process and forward data at the data link layer (layer 2) of the OSI model by using hardware addresses.Some network switches can do the same process at the network layer (layer 3) by including routing functionality as add-on. Those specific network switches are called layer-3 or multilayer switches. What makes the network switch different from other switches is that, it forwards data only to the devices that need to receive it. Knowing how to configure a network switch is just one of the skills you need to learn to fully understand how your network can be at its topnotch status.
Types of Network Switches
Before we proceed with how to configure a network switch, let’s define two types of network switches first. The unmanaged and managed network switch:
The unmanaged network switch is for the effortless plug in and then they’ll work right away. You don’t need to ask how to configure a network switch if you’ll be using the unmanaged type. This is the common switch we find in our home network, our desk, in a lab or even in a conference room, for as long as a few more ports are needed.
The managed network switch, on the other hand, provides the security, features and flexibility you need in exchange of the responsibility to learn how to configure a network switch. Since it can be controlled and custom-fitted, you can protect your network better, and you can ensure the quality of service for those accessing your network.
Network switches are not the only switch you might be using in network management, so it can also help if you would get to know the basic types of network switches as you prepare for possible changes in your setup in the future. You can also opt for a trusted company to outsource the maintenance of your system and keep the stress at bay.
How to Configure a Network Switch from Cisco and Make It Work?
In general, the Cisco network switch is one of the widely used switches, and that makes people look for a dependable guide on how to configure a network switch from Cisco. This may be brought by good reviews of its versatility, reliability, flexibility and features. So, how to configure a network switch from Cisco and make it work? Just follow these steps below:
1: Connect to the device via console
Use a terminal emulation software such as PuTTY and connect to the console of the switch. You will get the initial command prompt “Switch>”
Type “enable” and hit enter. You will get into privileged mode (“Switch#”)
Now, get into Global Configuration Mode:
Switch# configure terminal
Switch(config)#
2: Set up a hostname for the particular switch to distinguish it in the network
Switch(config)# hostname access-switch1
access-switch1(config)#
3: Configure an administration password (enable secret password)
access-switch1(config)# enable secret somestrongpass
4: Configure a password for Telnet access
access-switch1(config)# line vty 0 15
access-switch1(config-line)# password strongtelnetpass
access-switch1(config-line)# login
access-switch1(config-line)# exit
access-switch1(config)#
5: Define which IP addresses are allowed to access the switch via Telnet
access-switch1(config)# ip access-list standard TELNET-ACCESS
access-switch1(config-std-nacl)# permit 10.1.1.100
access-switch1(config-std-nacl)# permit 10.1.1.101
access-switch1(config-std-nacl)# exit
!Apply the access list to Telnet VTY Lines
access-switch1(config)# line vty 0 15
access-switch1(config-line)# access-class TELNET-ACCESS in
access-switch1(config-line)# exit
access-switch1(config)#
6: Assign IP address to the switch for management
!Management IP is assigned to Vlan 1 by default
access-switch1(config)# interface vlan 1
access-switch1(config-if)# ip address 10.1.1.200 255.255.255.0
access-switch1(config-if)# exit
access-switch1(config)#
7: Assign default gateway to the switch
access-switch1(config)# ip default-gateway 10.1.1.254
8: Disable unneeded ports on the switch
!This step is optional but enhances security
!Assume that we have a 48-port switch and we don’t need ports 25 to 48
access-switch1(config)# interface range fe 0/25-48
access-switch1(config-if-range)# shutdown
access-switch1(config-if-range)# exit
access-switch1(config)#
9: Save the configuration
access-switch1(config)# wr
This is just one of the ways to set up and learn how to configure a network switch. These steps that can be followed for the basic setup of Cisco switches. Other things can be configured in different ways depending on the requirements of each particular network.
 (5 votes, average: 5.00 out of 5)